Elevating Your Holiday Crafts with 3D Manger Tumbler Wrap Sublimation
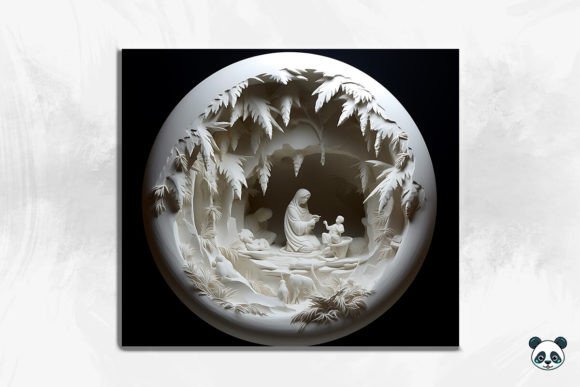
The holiday season brings a unique rush for crafters and small business owners alike, where the demand for personalized, faith-inspired items skyrockets. Among the most popular trends recently is the 3D Manger Tumbler Wrap Sublimation. This isn't just a flat image; it is a design technique that adds depth, shadow, and realism to the traditional nativity scene, making it pop off the surface of a 20 oz skinny tumbler. Whether you are a seasoned entrepreneur looking to expand your Christmas catalog or a hobbyist wanting to create a special gift for a family member, understanding the nuances of these digital files is crucial for success.
When you purchase an instant digital download PNG featuring a Manger seamless pattern or a full wrap, you are buying potential. However, the gap between a professional-looking product and a disappointing result often lies in the preparation and application process. Many creators rush into printing without fully evaluating the file specifications or their equipment settings, leading to wasted blanks and ink. Let's walk through the common pitfalls associated with using 3D Christmas tumbler designs and how you can avoid them to ensure high-quality results every time.
Understanding the Dimensions and Resolution Trap
One of the most frequent misunderstandings involves file sizing and resolution. You might receive a ZIP file containing a Manger tumbler wrap listed as 9.3 inches by 8.2 inches at 300 DPI. On paper, this sounds perfect for a standard 20 oz skinny tumbler. However, a critical mistake many beginners make is resizing these images in their editing software without maintaining the aspect ratio or checking the effective resolution.
If you stretch a straight tumbler wrap PNG to fit a slightly different brand of tumbler that has a different circumference, you risk dropping the DPI below the printable threshold. Once an image dips below 300 DPI, the crisp lines of the Manger watercolor details and the subtle gradients of the 3D background can become pixelated or blurry after pressing. The "3D" effect relies heavily on smooth transitions between light and shadow; compression artifacts ruin this illusion.
Better Approach: Before you even open your sublimation printer settings, measure your specific tumbler blank. While 9.3 x 8.2 is a standard approximation, blanks vary by manufacturer. Use your design software to check the image size against your physical measurements. If you must resize, ensure you are scaling proportionally. If the file needs to be larger to cover a seam overlap, verify that the resolution remains high enough. Never assume "close enough" works in sublimation; the heat press reveals every flaw.
The Myth of "One Size Fits All" in 3D Designs
Another area where creators often stumble is assuming that a 3D Manger seamless pattern will look identical on every type of cup. The term "3D" in these designs usually refers to the visual depth created by shading and layering within the PNG itself, not a physical texture. When applied to a curved surface like a skinny tumbler, perspective distortion can occur if the wrap isn't aligned correctly.
A common error is ignoring the seam placement. With a busy Manger background or a complex nativity scene, placing the seam right through a key figure (like the baby Jesus or the star) can disrupt the visual flow and look unprofessional. Furthermore, some users try to apply these wraps to tumblers that aren't perfectly straight or have ridges, which causes the image to warp, breaking the 3D illusion.
Practical Advice: Always print a paper mockup first. Wrap the printed paper around your blank tumbler to visualize where the seam will land. Adjust your canvas in your software so that the seam falls in a less critical area of the design, perhaps in the sky or a darker section of the Manger png elements. Additionally, ensure you are using high-quality, straight-walled tumblers designed specifically for sublimation. Coated stainless steel is essential; attempting this on ceramic or non-coated metal will result in no transfer at all.
Color Management and the "Muddy" Result
Sublimation is a chemical process where ink turns into gas and bonds with polymer coatings. A frequent complaint among those using 3D Tumbler Christmas designs is that the colors come out dull, muddy, or shifted, particularly in the darker areas of the manger scene. This often happens because the user treats sublimation ink like standard office ink.
The Manger 3D seamless pattern likely contains deep browns, rich golds, and soft watercolor blues. If your ICC profile is incorrect, or if you are pressing at the wrong temperature, those dark tones can turn black and lose detail, while the lighter watercolor sections may appear washed out. Over-pressing is a silent killer of vibrancy; leaving the tumbler in the press too long can scorch the coating, giving the entire Manger wrap a yellowish tint.
How to Avoid It: Calibrate your monitor and printer. Use an ICC profile specific to your ink and paper combination. When working with detailed 3D design files, it is often better to slightly increase the saturation in your editing software before printing, as the sublimation process naturally dulls colors slightly upon heating. Stick rigorously to the recommended time and temperature for your specific tumbler brand—usually around 380°F for 50-60 seconds, but always verify with your blank supplier. Use new, high-quality sublimation paper; reusing paper or using cheap alternatives leads to ghosting and color loss.
Maximizing the Value of Your Digital Download
When you buy a Manger skinny tumbler design, you are paying for convenience and artistry. However, some users overlook the versatility included in the file. A well-made Manger seamless pattern isn't just for one tumbler; it can be tiled for larger projects, cropped for coasters, or used as a background for greeting cards. Limiting the use of the file to a single application reduces your return on investment.
Additionally, failing to organize your digital assets can lead to confusion later. Since you receive an instant digital download, it is easy to lose the original high-resolution file amidst dozens of other purchases. Losing the source file means you might be tempted to use a low-res screenshot later, which ruins quality.
Strategic Tip: Create a dedicated folder system for your holiday inventory. Store the original ZIP file immediately upon download. Explore the edges of the Manger background to see if elements can be isolated for other products. If the design includes a seamless pattern, test tiling it in your software to create custom wrapping paper or fabric prints for matching gift sets. This approach turns a single tumbler wrap into a cohesive product line.
Final Checks Before You Press
Before you commit to a production run, pause and evaluate. Do you have the right blanks? Is your heat press evenly heated? Have you lint-rolled the tumbler to remove dust that could cause white specks in the final 3D Manger Tumbler Wrap Sublimation result? These small steps are what separate amateur attempts from professional-grade merchandise.
Remember, the goal is to create a beautiful, lasting tribute to the Christmas story that recipients will cherish. By respecting the technical requirements of the Manger tumbler wrap and avoiding common shortcuts, you ensure that the final product honors both the artistry of the design and the skill of the creator. Take your time, test your settings, and let the depth of the 3D design shine through on every cup you create.